Help & Support
Quick, plain-English walkthroughs of how Offsider actually works. Tap a topic to expand it.
Take a tour
Getting Around

Always there, on almost every screen — tap any of them any time. Nothing you're doing gets lost; you can always come back to it.
Home is what you land on when you open Offsider. It's both a quick-glance dashboard — the row of tappable number cards (Approvals, Outstanding, Today's Jobs, and more) each jump straight to the relevant filtered list — and the chat window where you talk to Offsider directly by typing what you need. Tap Home from anywhere to get back to this starting point.
The total still owed to you: the remaining balance on every invoice that isn't fully paid (drafts, sent and part-paid). Tap it to open those invoices in Docs.
Invoices that have been sent, or part-paid, for longer than your payment terms. The smaller figure underneath is the total still owed on them, and it only shows when there's at least one. Tap it to open just those invoices in Docs.
How many jobs are scheduled for today (Sydney time), whatever their status; archived jobs aren't counted. Tap it to see them under Docs → Jobs.
The money actually received this week, Monday to Sunday: the payments you've recorded against invoices, not what you've invoiced. Tap it to open the week's revenue report.
Approvals is where anything Offsider's AI has drafted on your behalf waits for your review before it actually happens — a quote or invoice from a conversation, or a payment reminder. Nothing here reaches a customer until you tap Approve. The small red dot on this icon means at least one item is waiting for your decision; no dot means you're all caught up.
Docs is the full list of every quote and invoice you've created, however it was made (chat, a wizard, or an approved AI draft) — plus your scheduled jobs, under the same screen's Jobs view. Search, filter by status or date, and tap any one to open, send, or manage it.
Follow-ups gathers everything that needs a nudge before it's forgotten: unpaid invoices, quotes nobody's replied to yet, overdue jobs, and customers who've gone quiet. It's the "what should I chase today" screen — a shorter, action-focused list, separate from Docs' complete record of everything.
Customers holds every customer record — contact details, financial history (what they owe, what they've paid), tags, tiers, and message history. Search or filter the list, or tap a customer to see everything about them in one place.
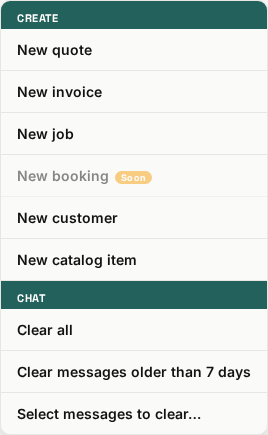
Tap the menu icon (three lines, top-left on Home) to open this popup.
Starts the guided, 3-step quote wizard: pick a customer, add line items, then review and create. This is a direct way to build a quote by hand, step by step — separate from, and just as valid as, asking Offsider to draft one for you in chat.
The exact same 3-step wizard as New quote, just creating an invoice instead of a quote from the start.
Starts the 3-step job wizard (title and date, then optional time/address/notes, then review) to manually schedule a job. A job created this way starts as "Scheduled" — you advance its status later from the job's own detail view.
A placeholder for an upcoming Bookings feature. Tapping it just shows a "coming soon" message for now — nothing happens.
Starts the 3-step customer wizard: a name (required) plus optional phone and email first, then optional details — company and ABN, customer type, tier, tags, address and marketing opt-in — then review. Creates a real customer record immediately — the same kind of record you'd get by saving one from a document.
Starts a short 2-step wizard to save a reusable service or material (a name, a type, and an optional unit like "hour" or "each") to your catalog, so it's offered as a quick pick next time you're building a quote or invoice, instead of typing the same line from scratch.
Clears every message out of your chat view. Important: this only affects what you see in this conversation — nothing is deleted on the server, and it doesn't undo or cancel anything you've already done (documents already sent, approvals already made, etc. are all untouched).
The same display-only clearing as "Clear all," but only removes messages older than a week, keeping your recent conversation visible.
Lets you tick individual messages to remove from view — for tidying up specific messages rather than clearing everything or everything-but-recent.

Tap your avatar (top-right on most screens) to open this menu.
A simple on/off switch for the app's colour theme. Your choice is remembered on this device.
Opens the full Settings screen: your business profile, financial defaults, notification preferences, security (PIN/password), connected channels, and more, organized into expandable sections.
Opens the Reports Hub: charts (revenue, new customers, month comparisons), a library of on-demand reports, a custom report builder, saved reports, scheduled recurring reports, and a history of everything generated or sent.
Opens your catalog of saved services and materials — the same list quotes and invoices pull quick-pick suggestions from — plus your selected trade types.
Opens a short list of guided tours you can take any time: Around the app and From job to payment are quick walkthroughs, and four Learn every button tours go through each control one at a time. Each slide moves on by itself after a few seconds; use Next, Back, the pause button or swipe to go at your own pace. The same tours are at the top of this page.
Opens this Help page. You're here.
Shows a "coming soon" message — there's currently no paid-plan upgrade flow to start.
Logs you out of Offsider on this device. You'll need to log back in to continue.

This is the small "?" button at the top of every main screen, just to the left of your avatar.
Tap it to turn on Help Mode. The button fills in and pulses, and a small bar appears beside it saying Touch anything to learn, with Search and Exit buttons under it. Now move over (or touch) any part of the screen: things that have a help explanation get outlined. Tap one and a small bubble appears next to it with a short summary. Nothing you tap in Help Mode actually happens — it only explains — so it's safe to poke around.
The bubble has a Full explanation → link that opens the complete section on this page, and a ✕ (or a tap anywhere else) to close just the bubble so you can keep checking other things. It also works on open windows like a document, job or payment window.
The button always stays in its spot beside your avatar. To leave Help Mode, tap the pulsing button again, tap Exit in the bar, or press Escape. The bar's Search button opens this Help page with a search box, so you can look something up by word instead; and Help & Support in the profile menu opens this page directly, for reading from the start.
Tap it to turn on Help Mode. The button fills in and pulses, and a small bar appears beside it saying Touch anything to learn, with Search and Exit buttons under it. Now move over (or touch) any part of the screen: things that have a help explanation get outlined. Tap one and a small bubble appears next to it with a short summary. Nothing you tap in Help Mode actually happens — it only explains — so it's safe to poke around.
The bubble has a Full explanation → link that opens the complete section on this page, and a ✕ (or a tap anywhere else) to close just the bubble so you can keep checking other things. It also works on open windows like a document, job or payment window.
The button always stays in its spot beside your avatar. To leave Help Mode, tap the pulsing button again, tap Exit in the bar, or press Escape. The bar's Search button opens this Help page with a search box, so you can look something up by word instead; and Help & Support in the profile menu opens this page directly, for reading from the start.
Working With Records
Viewing a quote or invoice
What every button on an open document does
›
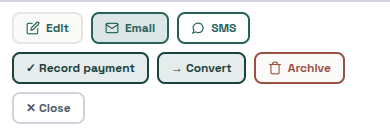
Tapping any quote or invoice in Docs opens it full-screen with the PDF on top and this action bar underneath. Record payment only appears on invoices; Convert only appears on quotes — they never show together on the same document.
✕ Close
Closes the document and returns to wherever you opened it from. Appears both top-left (header) and at the end of the action bar — same action either way.
Edit
Switches to an editable form for this document's date, customer name (as shown on this document only), job address, and notes. Line items are editable here too.
Email / SMS
Opens a preview of the message before it sends — you can review and edit the subject/body first. The customer's email or phone fills in automatically if you already have it on file; if not, you're asked for one right there.
Record payment (invoices only)
Opens the Record Payment window for this invoice — see "The Record Payment window" below for exactly how the amount field works.
Convert (quotes only)
Turns this quote into a new invoice with the same customer, items and notes — covered in more detail in "Quotes, invoices & getting paid" below. The original quote stays on file, marked as converted.
Archive / Restore
Instantly tucks the document out of your default Docs list (or brings it back) — no confirmation step either way, and nothing is deleted. An archived document is still fully there, searchable, and reachable any time via "Include archived" in the Docs filter panel.
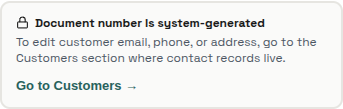
In the edit form, the document number is fixed (generated automatically), and there's a Go to Customers → link — that's a reminder that a customer's email, phone, and address live on their actual customer record, not on this one document, so editing them here isn't possible; the link takes you straight there.

Save changes / Cancel (edit mode)
Save changes applies your edits and regenerates the PDF. Cancel (also available as ← Cancel at the top of the edit screen) discards anything you changed and returns to the normal view — both do the exact same thing, just placed in two convenient spots.
Viewing a job
Status button, editing, and archiving a job
›

Tapping any job (in Docs' Jobs view, or wherever else a job is listed) opens this detail screen.
✕ Close
Closes the job and returns to wherever you opened it from.
Edit
Switches to an editable form for the job's title, date, start time, site address, notes, and status.
One tap steps the job forward through its lifecycle: Scheduled → In progress → Done. The button's own label changes each time to show what tapping it again will do next (Start, then Complete). Every tap applies immediately — there's no confirmation step, unlike Archive below, so make sure you're advancing the right job before you tap.
Archive
Unlike the status button above, Archive does ask you to confirm first — it's a bigger, less-easily-undone step (it removes the job from your normal lists) than simply moving a job along its own status, so it gets a proper "are you sure" step where the status button doesn't.

Status dropdown (edit mode)
The same Scheduled/In progress/Done status, but here you can jump straight to any of the four values (including Cancelled, which the quick ▶ button never sets) — useful if a job needs to skip a step or go backwards.

Save changes / Cancel (edit mode)
Save changes applies your edits. Cancel (also available as ← Cancel at the top) discards them and returns to the normal view.
The Record Payment window
Recording a full or partial payment on an invoice
›
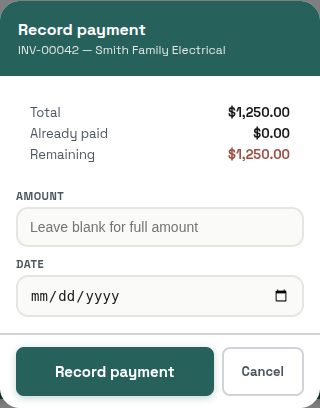
Record payment
Saves the payment against this invoice. As covered in "Quotes, invoices & getting paid" above: the amount is pre-filled with the full remaining balance, so tapping Record payment as it stands records a full payment; type a lower number for a part payment. An empty amount, zero, or more than what's still owed is rejected. The date defaults to today but can be backdated if the payment actually happened earlier.
Cancel
Closes the window without recording anything.
PIN lock
Setting a PIN, and what happens when the app locks
›
Setting a PIN
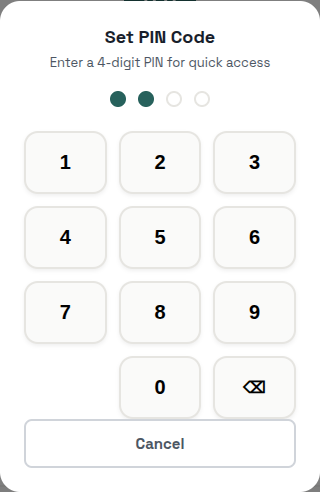
Found under Settings → Security. This keypad sets a 4-digit PIN used only to unlock Offsider itself on this device — it's completely separate from your login password, and it's not something a customer or anyone else ever sees or uses. Tap a digit to enter it, the delete key (⌫) removes the last digit, and Cancel closes the keypad without changing anything. You'll be asked to enter the same 4 digits twice, to confirm.
When the app is locked
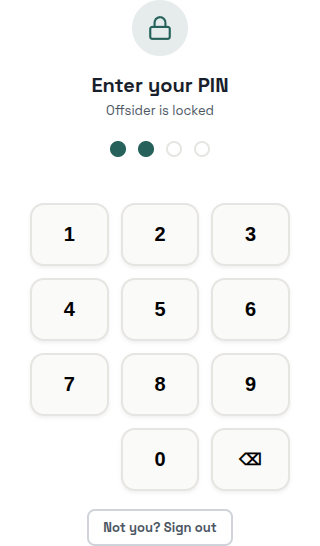
Once a PIN is set, this full screen appears whenever the app needs to be unlocked (e.g. after being away from it for a while) — it blocks everything else until you enter the correct 4 digits, checked securely on the server, never just compared on your device. If it's not you trying to get in, tap Not you? Sign out instead of guessing the PIN — that signs the current session out completely rather than leaving it sitting locked.
Finding & Filtering
Approvals, Customers, and Docs all share the same header layout, so it's covered once here instead of three times:
- ← Back arrow — returns to the previous screen.
- The screen title (e.g. "Approvals") — tap it to reopen the daily-report popup if you've dismissed it.
- Speaker icon — normally reads a short spoken summary aloud. This feature is currently switched off app-wide, so you won't see this icon in the app today — noted here for completeness, not because it's something you can use right now.
- Avatar — opens the profile menu (see "Getting Around" above).
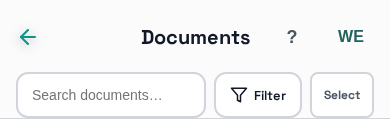
- Search — filters the list instantly as you type, no need to press Enter.
- Filter — opens a panel of options specific to that screen (covered separately below for each one) plus a small number badge showing how many filters are currently active.
- Select — turns on a bulk-select mode so you can tick several items and act on all of them at once, instead of one at a time.
- A-Z index — the letters running down the right edge of the list; tap or drag your finger down them to jump straight to that letter, the same way a contacts app works.
Approvals screen: search & filter
Not to be confused with "How approvals work" below — this one's about the screen's own controls
›
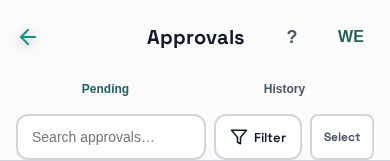
This section is only about the search/filter/select controls shown above. For what "needs approval" actually means and why, see "How approvals work" further down this page.
Pending / History tabs
Pending is the default tab — everything still waiting for you to approve, reject, or edit, with the full search/filter/select/A-Z tools above it. History shows everything already resolved (approved, rejected, or expired) as a simple read-only list — there's nothing left to act on there, so it drops the search/filter/select row and the A-Z index entirely.
Filter panel
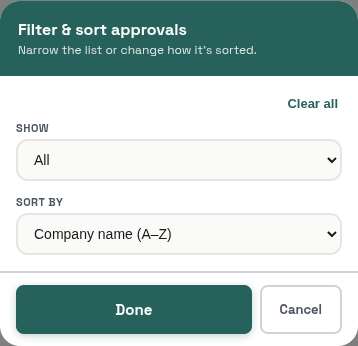
Show narrows the list to All, Quotes, Invoices, or Bookings (Bookings isn't built yet, so that option won't currently match anything).
Sort by reorders the list: Company name A–Z or Z–A, Amount high-to-low or low-to-high, or Date newest or oldest first.
Clear all resets both back to their defaults (All, Company name A–Z) in one tap.
Sort by reorders the list: Company name A–Z or Z–A, Amount high-to-low or low-to-high, or Date newest or oldest first.
Clear all resets both back to their defaults (All, Company name A–Z) in one tap.
Customers screen: search & filter
Filter options, plus 3 extra action buttons
›
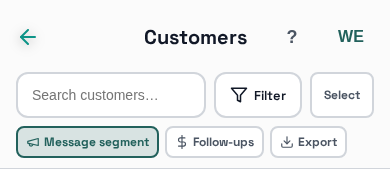
Message segment
Sends one email or SMS to every customer who matches your Filter settings (tags, tier, type, opted-out) — handy for reaching a specific group, like everyone with a particular tag, at once. It ignores the search box and the Active only setting, and it skips anyone opted out of marketing. You see a count and can edit the message before it sends.
Follow-ups
A shortcut to the Follow-ups screen — the same destination as tapping Follow-ups in the bottom nav. It opens on whichever tab you used there last, until you close or reload the app (Unpaid the first time).
Export
Downloads a CSV of the customers matching your search box and Filter settings, with no cap on the number of rows — so narrow the list first if you only want a subset. The Active only setting isn't applied to the export.
Filter panel
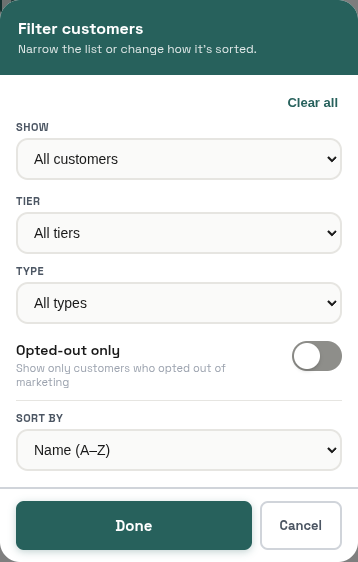
Show — All customers or Active only: customers who currently have a quote or invoice that's Sent or Part-paid, or a Scheduled or In progress job created from one of their quotes or invoices. Drafts, and jobs added by hand with no linked document, don't count.
Tags — if you've tagged any customers, they appear here as tappable chips; tap one or more to narrow the list to customers carrying that tag (not shown in the screenshot above since this test account has none set up yet).
Tier and Type — narrow by whatever tier labels you've defined (Settings → Customer Tiers) and Business (B2B) vs Residential (B2C).
Opted-out only — shows only customers who've opted out of marketing messages, useful for confirming you're respecting that before a bulk send.
Sort by — Name A–Z/Z–A, Outstanding balance high-to-low/low-to-high, or Last contact most-recent/oldest.
Clear all resets everything above back to its default in one tap.
Tags — if you've tagged any customers, they appear here as tappable chips; tap one or more to narrow the list to customers carrying that tag (not shown in the screenshot above since this test account has none set up yet).
Tier and Type — narrow by whatever tier labels you've defined (Settings → Customer Tiers) and Business (B2B) vs Residential (B2C).
Opted-out only — shows only customers who've opted out of marketing messages, useful for confirming you're respecting that before a bulk send.
Sort by — Name A–Z/Z–A, Outstanding balance high-to-low/low-to-high, or Last contact most-recent/oldest.
Clear all resets everything above back to its default in one tap.
Docs screen: search & filter
The most options of any filter panel in the app
›
Filter panel
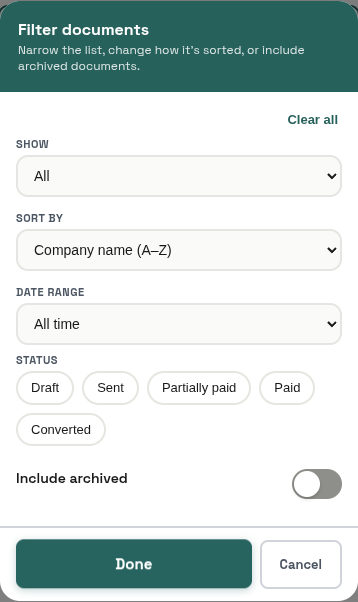
Show switches between All, Quotes, Invoices, or Jobs — this changes which of the other options below are relevant (Jobs, for instance, has no amount or archiving concept, so several options disappear when it's selected).
Sort by — the same Company name/Amount/Date options Approvals has (documents only, not shown for Jobs).
Date range — All time, Last 30 days, This quarter, This year, or Custom… (which reveals two date pickers for an exact range). Documents only.
Status chips — which statuses show up depends on whether you're looking at documents (Draft/Sent/Partially paid/Paid/Converted) or Jobs (Scheduled/In progress/Done/Cancelled); tap as many as you like, or none for all statuses.
Include archived — off by default; switch it on to bring archived documents back into the search results. Documents only.
Overdue only — appears only while viewing Invoices; narrows to invoices that are actually past their due date.
Today only — appears only while viewing Jobs; narrows to jobs scheduled for today.
Sort by — the same Company name/Amount/Date options Approvals has (documents only, not shown for Jobs).
Date range — All time, Last 30 days, This quarter, This year, or Custom… (which reveals two date pickers for an exact range). Documents only.
Status chips — which statuses show up depends on whether you're looking at documents (Draft/Sent/Partially paid/Paid/Converted) or Jobs (Scheduled/In progress/Done/Cancelled); tap as many as you like, or none for all statuses.
Include archived — off by default; switch it on to bring archived documents back into the search results. Documents only.
Overdue only — appears only while viewing Invoices; narrows to invoices that are actually past their due date.
Today only — appears only while viewing Jobs; narrows to jobs scheduled for today.
Reports Hub: the 6 tabs
Charts, on-demand reports, custom reports, and scheduling
›
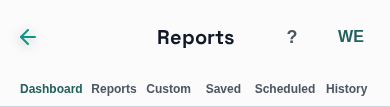
Dashboard
The default tab — three always-on charts: revenue over time, new customers, and this month vs. last month.
Reports
A library of ready-made, on-demand reports — tap one to generate it immediately and, if you like, email it to yourself.
Custom
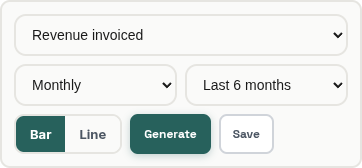
Build your own chart: pick a metric (e.g. revenue invoiced), a group-by (Daily/Weekly/Monthly/Quarterly/Yearly), and a range (Last 3/6/12 months, This/Last year, or Custom — which reveals two date pickers). The Bar / Line toggle switches the chart style. Generate runs it; Save keeps this exact configuration for one-tap reuse later, under the Saved tab.
Saved
Every custom report you've saved — run it again, edit its settings, turn it into a recurring schedule, or delete it.
Scheduled

Reports that generate and get emailed to you automatically on a recurring basis. + New schedule sets one up; existing schedules here can be turned on/off or deleted.
History

Every report ever generated or sent — the daily morning brief, weekly/monthly summaries, and anything run on-demand. The type filter narrows it down to just one kind (e.g. only Daily reports).

Load more fetches the next page — the list doesn't load your entire history at once.
Settings & Wizards
Settings: General
Business details, ABN lookup, logo
›
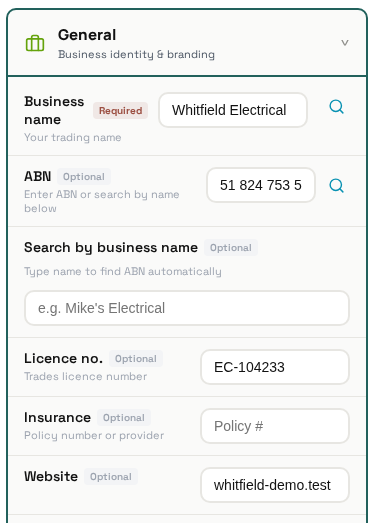
ABN lookup — works both directions
There are two separate lookup icons next to the ABN field. One searches the ABN registry by your business name and shows you a pick-list of matches to choose from. The other works in reverse: type or paste an ABN you already have and it looks up the registered business name and fills it in, formats the ABN and tells you whether it's active. It doesn't fill in your address, and it needs all 11 digits. Use whichever direction is faster for what you've got on hand.
Licence and insurance
Your trades licence number prints in the header of your quote and invoice PDFs as "Licence: …". The insurance details are saved on your profile, but nothing uses them yet: they aren't printed on documents or shown anywhere else.
Logo
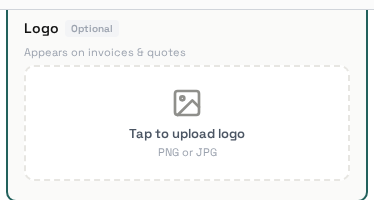
Your logo appears on every quote/invoice PDF and on the public quote accept/reject page your customers see.
Settings: Contact & Address
Phone, email, and address with autocomplete
›
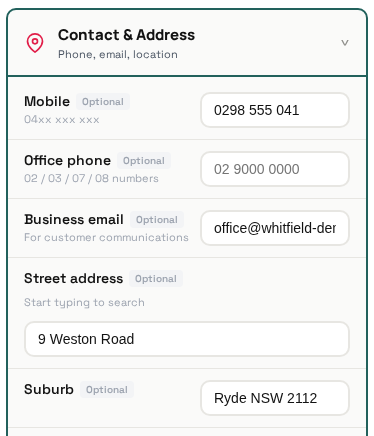
Your business phone, email, and address — these also appear on your quote/invoice PDFs. The address field autocompletes as you type, so you can usually just pick your address from the dropdown instead of typing the whole thing out (including postcode and suburb) by hand.
Settings: Financial
GST, payment terms, and bank details
›
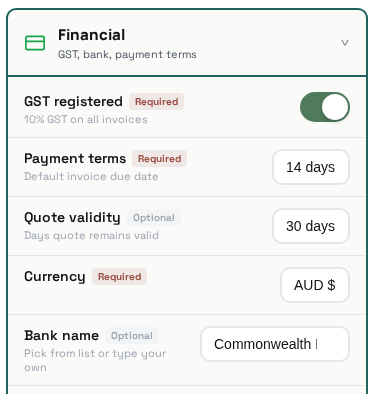
GST registered — switch this on if your business is GST-registered; it changes how GST is calculated and labelled on your documents. Leave it off if you're not registered.
Default payment terms and quote validity (in days) pre-fill on every new invoice/quote so you don't have to set them each time — you can still override either on an individual document.
Bank details (BSB, account number, bank name) print on your invoices so customers know where to pay by direct transfer. The bank name field autosuggests as you type, matching it against known Australian bank names.
Default payment terms and quote validity (in days) pre-fill on every new invoice/quote so you don't have to set them each time — you can still override either on an individual document.
Bank details (BSB, account number, bank name) print on your invoices so customers know where to pay by direct transfer. The bank name field autosuggests as you type, matching it against known Australian bank names.
Settings: Documents
PDF colours and text blocks, plus auto-archive rules
›
Standard text blocks you set once instead of typing per document. The footer note prints on every quote/invoice PDF; terms & conditions print only when the footer is blank (they take its place); default inclusions/exclusions pre-fill new quotes; and the signature is added to standard emails Offsider sends, never to PDFs.
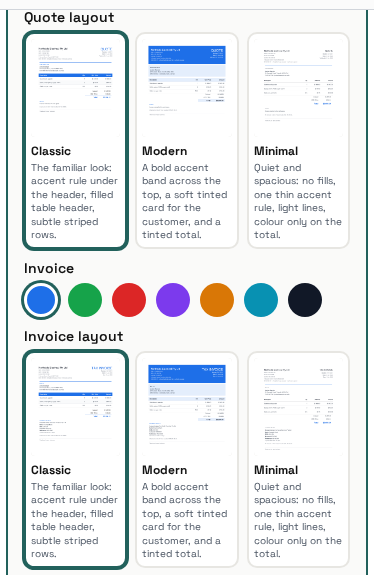
Document colours
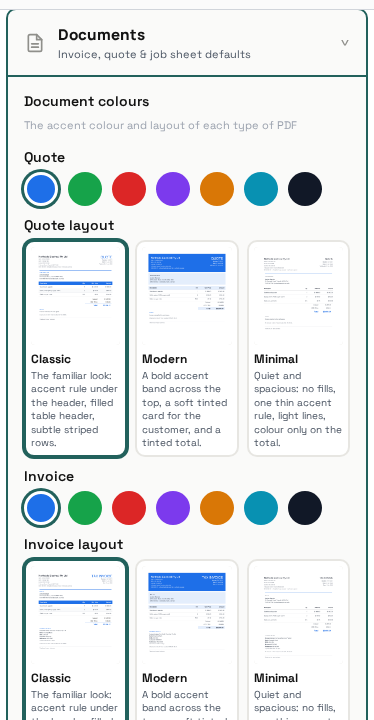
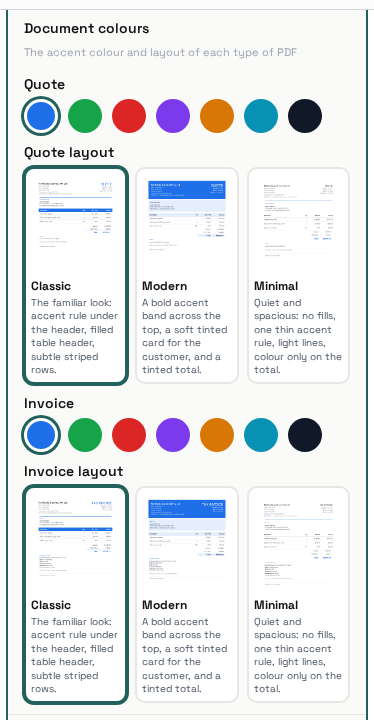
Each type of document, Quote and Invoice, has its own row of colour swatches at the top of this section. The colour you pick becomes the accent on that type's PDF: the title, headings and table header (or the band, tint and total, depending on the template below). Tap Save to apply it — this immediately updates the PDF of every unsent, unarchived quote and invoice to the new colour, as well as anything you create afterwards. Sent and archived documents keep their original colour.
Document templates
Under each type's colour swatches there is one card per template (Classic, Modern, Minimal), each showing a live preview of that layout in the colour you have selected. The previews use made-up sample details, not your own. Tap a card to choose it and tap Save: your unsent, unarchived quotes and invoices switch to the new template straight away, and so does anything you create afterwards. Documents you have already sent keep the file the customer received; if you edit a sent document later, it is rebuilt in the current template and colour.
Auto-archive old documents
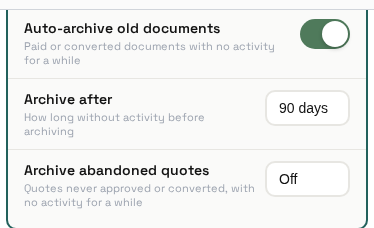
This is the automatic version of the manual Archive/Restore action described under "Working With Records" above. With it on, a daily sweep archives documents that are paid or converted and have had no activity for the "Archive after" number of days (30 to 365, 90 by default) — activity being the later of when the document was created and its last recorded payment. Nothing is deleted, and you can restore any archived document.
Archive abandoned quotes
Off by default. Choose a number of days and quotes that are still Draft or Sent and were created at least that long ago get archived automatically — it keeps old, dead quotes out of your active list. It only runs while Auto-archive old documents is switched on, and it never touches invoices.
Settings: Offsider Behaviour
How the AI talks, follows up, and reminds
›
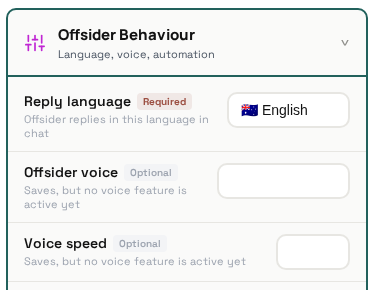
Reply language
Which language the AI uses when it drafts chat replies and customer messages.
Voice settings
Same dormant feature already noted under "Finding & Filtering" above (the speaker icon) — these settings configure something that isn't switched on app-wide yet, so changing them won't currently have a visible effect.
Auto follow-up invoices & Debtor reminders
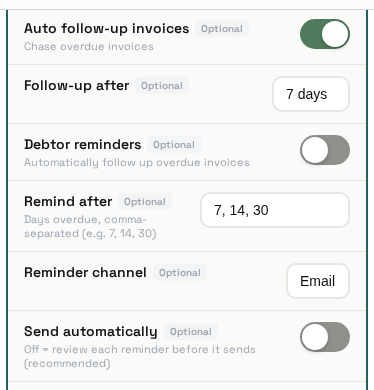
Debtor reminders turns on the automated daily sweep that finds sent invoices past due and, once one reaches a number of days in your Remind after list (default 7, 14, 30), drafts a payment reminder on the channel you choose (Email, SMS or both). The Auto follow-up invoices toggle and its Follow-up after box are saved, but nothing acts on them — use Debtor reminders. Send automatically decides what happens next: on, the sweep sends the reminder straight away; off, the sweep still drafts it but leaves it sitting in Approvals for you to review first. Either way, this toggle only controls the automated sweep — if you ask the AI in chat to draft a reminder for a specific customer yourself, that request always lands in Approvals regardless of this setting, per "How approvals work" further down this page.
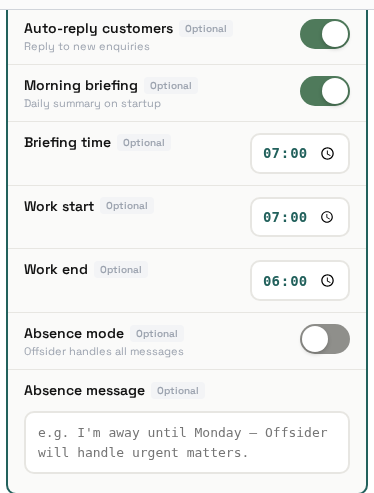
Auto-reply customers
Saved, but nothing reads it yet: Offsider doesn't reply to customer messages on its own, whichever way this is set.
Morning briefing
Saved, but neither this nor the time is used yet. The Telegram bot sends its morning briefing at a fixed 07:00 Sydney time to whoever is logged in there, and you can ask for one any time with /briefing.
Absence mode
Saved, but nothing reads it yet: turning it on doesn't make Offsider send your message to customers.
Settings: Notifications
What you get notified about, and where
›
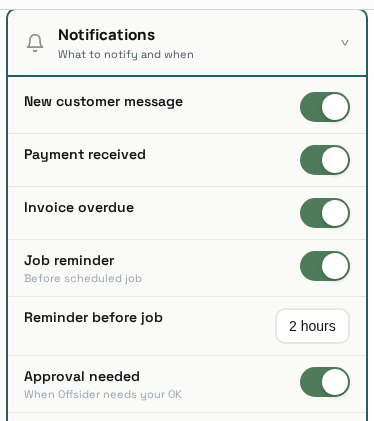
The 5 category toggles
Approval needed — notifies you when something lands in Approvals: an AI-drafted quote or invoice, a payment reminder, or a quote follow-up. Payment received — when a payment is recorded against an invoice. New customer message — despite the name, this notifies you when a new customer or a new lead is added; it doesn't fire when a customer sends you a message.
Invoice overdue and Job reminder (with its Reminder before job time) save your choice, but nothing acts on them yet — Offsider doesn't currently detect an overdue invoice or an upcoming job to notify you about, so switching them on or off has no effect today. (If automatic debtor reminders are on, the reminder it drafts shows up in Approvals and notifies you under Approval needed instead.)
Quiet hours
Quiet hours, with its From and Until times (Sydney time), silences the notifications above during that window: anything that would arrive then is skipped entirely — it isn't delivered later and doesn't appear in your notification list afterwards. That includes quote accepted/rejected notices, which have no toggle of their own. A few notices, like "Job marked done", aren't covered by any toggle or by quiet hours.
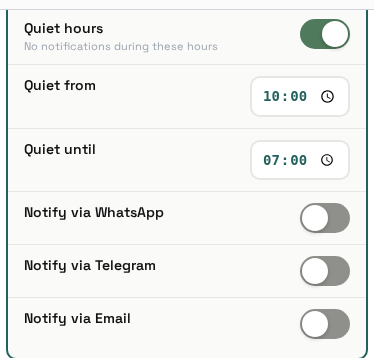
Where notifications go — 3 channel toggles
The toggles are WhatsApp, Telegram and Email. There is no toggle for push. Push notifications are sent on every notification to any device where you've turned notifications on (via the in-app prompt), and can't be switched off here.
Email works — switch it on and each notification is also emailed to your account's login address. Telegram delivers to your linked Telegram chat — log in to the Offsider Telegram bot and that chat is linked automatically (Settings → Channels shows Linked or Not linked). With no chat linked, nothing arrives even with the toggle on, and with a chat linked but the toggle off, nothing is sent. WhatsApp has no sender behind it at all, so that toggle saves but does nothing.
Settings: Channels
Five channels are listed — only Telegram is live
›
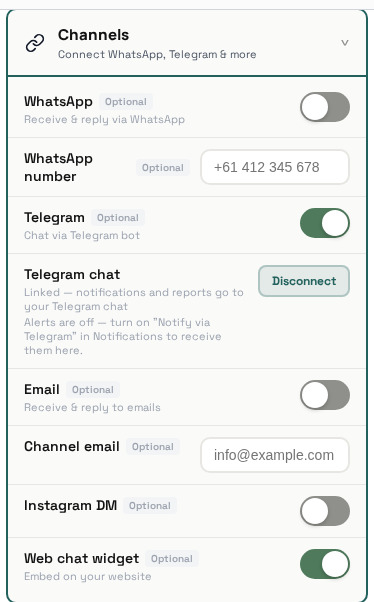
This screen lists five channels — WhatsApp, Telegram, Email, Instagram DM and Web chat widget — but a toggle showing here doesn't mean it's connected to anything. Only Telegram works end to end today; the rest save your settings but aren't live.
Telegram — live
Works by messaging the Offsider Telegram bot and logging in with your Offsider email and password. Logging in from a private chat also links that chat to your account: it then receives your Notify via Telegram notifications and Telegram report deliveries. The Telegram chat row shows Linked or Not linked; tap Disconnect, or send /logout in the bot, to unlink it. There is one chat per company (if several people log in, the most recent login receives the notifications), a chat is never shared between two companies, and group chats are never linked. Linking alone sends nothing: alerts and Telegram report deliveries arrive in the linked chat only while Notify via Telegram is on in Notifications, and the Telegram chat row tells you when it is off. The Channels toggle just allows or blocks the bot: it's on by default, and if you switch it off the bot replies that Telegram is turned off for your account.
WhatsApp — not live
The toggle and number are saved, but WhatsApp isn't switched on for customers yet — some groundwork is built, but it isn't configured or connected.
Email, Instagram DM and Web chat widget — not live
Email (the channel toggle and address) is saved but nothing receives or answers email through it — that's separate from "Notify via Email" under Notifications, which does send. Instagram DM is saved and nothing else. Web chat widget generates an internal embed key when you switch it on, but there's no chat widget to put on your website yet.
Settings: Security
PIN and password, both re-confirmed before changing
›
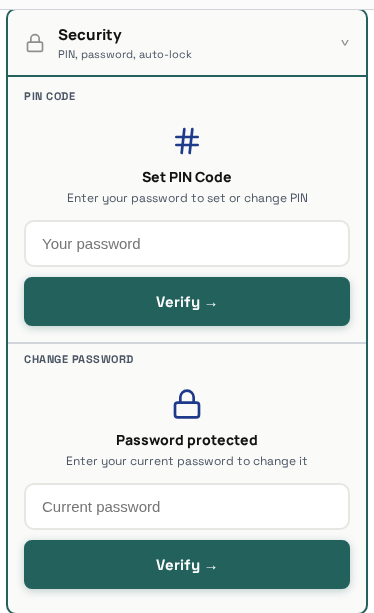
Both the PIN and Password sections ask you to enter your current account password before letting you change anything. That's deliberate: if your phone is ever picked up unlocked, whoever has it still can't lock you out by silently changing your PIN or password without knowing that password themselves.
Settings: Trades & Catalog, Customer Tiers
A pointer to Services & Rates, plus tier labels
›
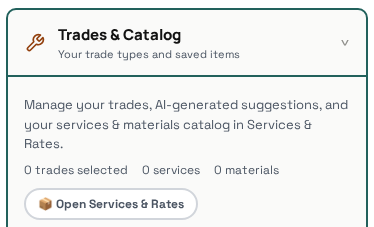
Trades & Catalog
This card doesn't hold any settings of its own — it's just a shortcut to Services & Rates (also reachable from the profile menu), where your actual list of services and materials lives.
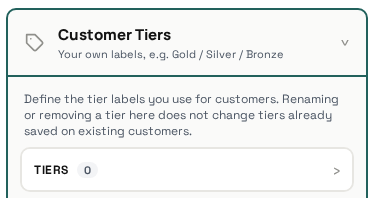
Customer Tiers
Define the tier labels (e.g. Standard, Priority, VIP) you can assign to customers and filter by on the Customers screen (see "Finding & Filtering" above). + Add tier creates a new one.
Settings: AI Usage
Usage stats, not approval rules
›
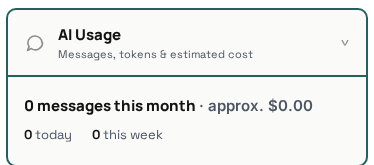
Shows how much you're using the AI — this is just usage stats. For what the AI is and isn't allowed to send without your OK, see "How approvals work" further down this page, rather than this section.
Settings: Account
Plan/Upgrade is a coming-soon stub
›
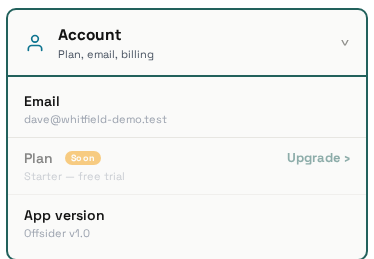
The Plan / Upgrade section is a "coming soon" placeholder — there's nothing to configure there yet. If your account has admin access, an Admin section also appears here; that's internal tooling and isn't covered in this guide.
Creation Wizards
Quote wizard
3 steps: customer, items, review
›
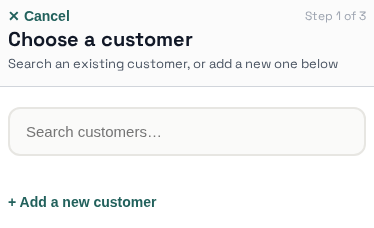
- Customer — pick an existing customer, or use the inline "+ Add a new customer" shortcut to create one on the spot without leaving the quote wizard.
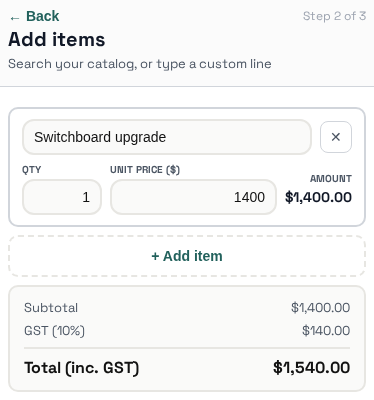
- Items — add items from your Catalog or type one-off line items, with quantity and price for each.
- Review — check the totals, then save or send.
Customer wizard
3 steps, including type pills and marketing opt-in
›
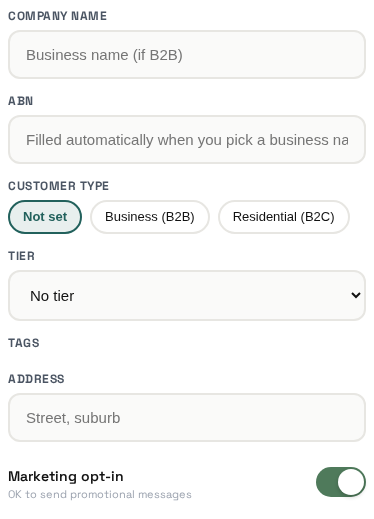
- Basics — a name (required), plus optional phone and email.
- More details (all optional) — company name and ABN; the type pills (Not set / Business (B2B) / Residential (B2C)) marking whether this is a business or residential customer; a tier (from Settings → Customer Tiers); any tags you've set up; an address; and a marketing opt-in toggle for whether they're OK receiving marketing messages (respected by the "Message segment" bulk-send and the Customers filter's "Opted-out only" option, both covered under "Finding & Filtering" above).
- Review — check the details, then Confirm & Create customer.
Job wizard
3 steps — always starts as "scheduled"
›
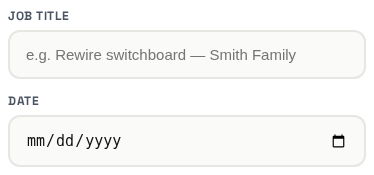
- The essentials — a job title and a date (both required).
- A few more details (all optional) — a start time (leave blank for all day), the job site address, and notes about the work.
- Review — check it, then Confirm & Schedule job.
This wizard doesn't ask for a customer. Whatever date you pick, a job you create here always starts with status "scheduled" — there's no way to create it directly as In progress or Done. Change its status afterward from the job view once it's created.
Catalog wizard
Just 2 steps — the shortest of the four
›
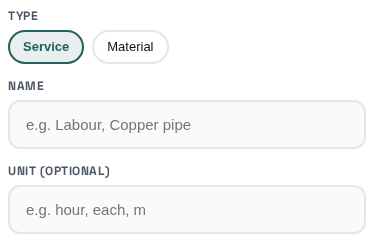
- Details — the type pills (Service / Material) mark what kind of item this is, plus a name (required) and an optional unit (e.g. "hour", "each", "m").
- Review — check it, then Confirm & Add item.
The wizard only saves the name, type and unit — it doesn't ask for a price or a description.
Using Offsider
Quotes, invoices & getting paid
Create a quote, send it, convert it, mark it paid
›
- Tap the menu button (top of Home) → New quote.
- Step 1: choose an existing customer, or add a new one.
- Step 2: add line items — pick from your saved Catalog or type your own.
- Step 3: review & confirm — this creates the quote.
- Open the quote → tap Email (or SMS) → review the message → send. The customer's email/phone is filled in automatically if you already have it on file.
- Once they're ready to go ahead, either they accept it themselves from the link you sent (see "What happens when a customer responds to a quote" below), or you tap Convert to turn it into an invoice yourself.
- Open the invoice → tap Record payment → check the amount (it's pre-filled with the full balance; change it for a part payment) → confirm.
Jobs
Create a job and track it through to done
›
- Menu button → New job.
- Step 1: the essentials — title and date.
- Step 2: a few more details — time, address, description (all optional).
- Step 3: review & confirm.
- Open the job any time and tap the status button to move it along: Scheduled → In progress → Done — one tap each, no confirmation needed.
- You don't always have to create a job by hand — accepting a quote, or approving a quote/invoice, automatically creates one for you too (unscheduled, so you can pick a date whenever suits).
Adding a customer
Their jobs and documents link up automatically
›
- Menu button → New customer.
- Step 1: the essentials — a name (phone and email are optional).
- Step 2: a few more details — company and ABN, customer type, tier, tags, address and marketing opt-in (all optional).
- Step 3: review & confirm.
- That's it — there's no separate "attach a document" step. The first time you create a quote or invoice for them, it shows up on their Customer page automatically, under the Documents tab.
How approvals work
What needs your OK, and what doesn't
›
- The rule: anything Offsider's AI drafts for you in chat that would send something to a customer or create a quote/invoice waits in Approvals for you to review first — approve it, edit it, or reject it. Nothing goes out to a customer without you tapping Approve.
- That covers a quote or invoice the AI puts together for you from a conversation, and a payment reminder the AI drafts for a customer who owes you money.
- Anything you do yourself directly in the app — the New Quote/Invoice/Job/Customer/Catalog item wizards, marking a job's status, adding a catalog item — happens immediately. No approval step, because it's your own action, not something sent externally on the AI's initiative.
- Short version: if the AI wrote it to send to someone, it waits for you. If you tapped the button yourself, it just happens.
What happens when a customer responds to a quote
Accept or reject, straight from the quote link
›
- When you email or text a quote, the link opens a simple page with the quote and two buttons: Accept and Reject.
- If they tap Accept: the quote is automatically converted into an invoice, a job is created for it, and the invoice is emailed straight back to them — you don't have to do anything, though you'll get a notification either way.
- If they tap Reject: they can leave a short optional reason. Nothing is converted or sent — you just get notified.
- This can only happen once per quote. Once they've responded, the same link just shows what they answered and the date — there's no way to change the answer. If something needs to change, send a new quote.
Catalog items
Save your usual services & materials once, reuse them everywhere
›
- Menu button → New catalog item (or Services & Rates in the profile menu).
- Choose Service or Material, give it a name and an optional unit (e.g. "hour", "each", "m").
- Review & confirm.
- Next time you're adding line items to a quote or invoice, your saved catalog items are offered as quick picks — no need to type the same thing from scratch every time.